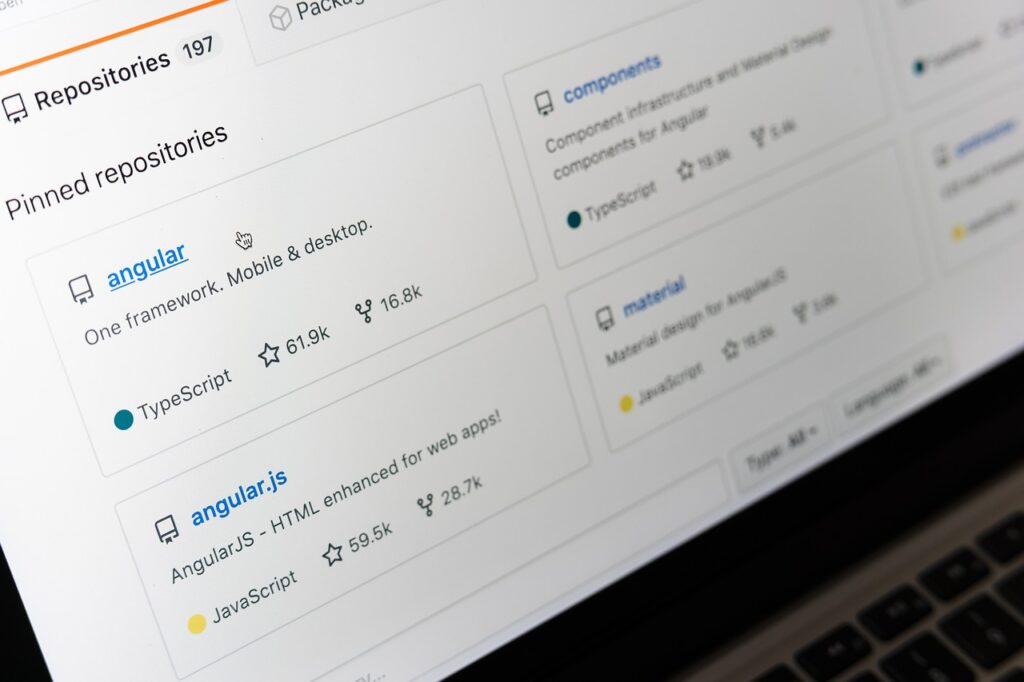
Angular Material is an User Interface component library for an Angular application. Angular Material components are useful in creating high-quality, responsive and beautiful UI applications. It is powered by Google. Therefore, it closely follows Google Material Design specifications.
We use HTML, CSS and Typescript to write the code in an Angular project. Typescript is a superset of JavaScript. The code in Typescript gets compiled to JavaScript first and then displays the output in the browser.
Here, in this post we will explain how to create an Angular Material project using Visual Studio 2019 Community Edition. Please check out my post “How To Install Visual Studio“, to install Visual Studio 2019 on your PC. It is very easy to manage both frontend and backend of a web application in a single solution using Visual Studio. Therefore, we have used Visual Studio to create our project here.
But, before creating an Angular Material project we need to install Node.js first.
Install Node.js
First check if you have Node.js installed on your system or not. To do this open command prompt and type node -v. This command will display the Node.js version, if Node.js is installed on your system. Else it will display something like “‘node’ is not recognized as an internal or external command”, which means Node.js is not installed on your system. Let’s follow the steps below to download and install Node.js on your system.
Step 1 : Open the following URL on your browser to download Node.js installer file for your platform.
https://nodejs.org/en/download/
I am using a 64-bit Windows platform. So I will download the latest LTS version of Windows 64-bit Installer (.msi) file.
Step 2 : Double click the downloaded installer file to start Node.js installation. Follow the prompts and click “Next” to proceed with the installation. Click “Finish” to complete the installation.
Now open the command prompt again. Type node -v and press Enter. It will display the version of Node.js we just installed. Node Package Manager (npm) will also be installed along with Node.js. To check if npm is installed or not, run the command npm –v in the command prompt. It will display the version of the npm installed.
Now let’s install Angular.
Install Angular
Installing Angular with the help of Angular CLI is very simple. You just have to type npm install –g @angular/cli in your command prompt and press Enter, to install Angular CLI on your system. It will take some time to install Angular CLI depending on your internet speed. Once the installation is finished, type ng version in your command prompt. It will display the version of Angular CLI along with versions of other packages installed.
Angular installation is now complete.
Create an Angular Project
Open Visual Studio 2019 Community Edition.
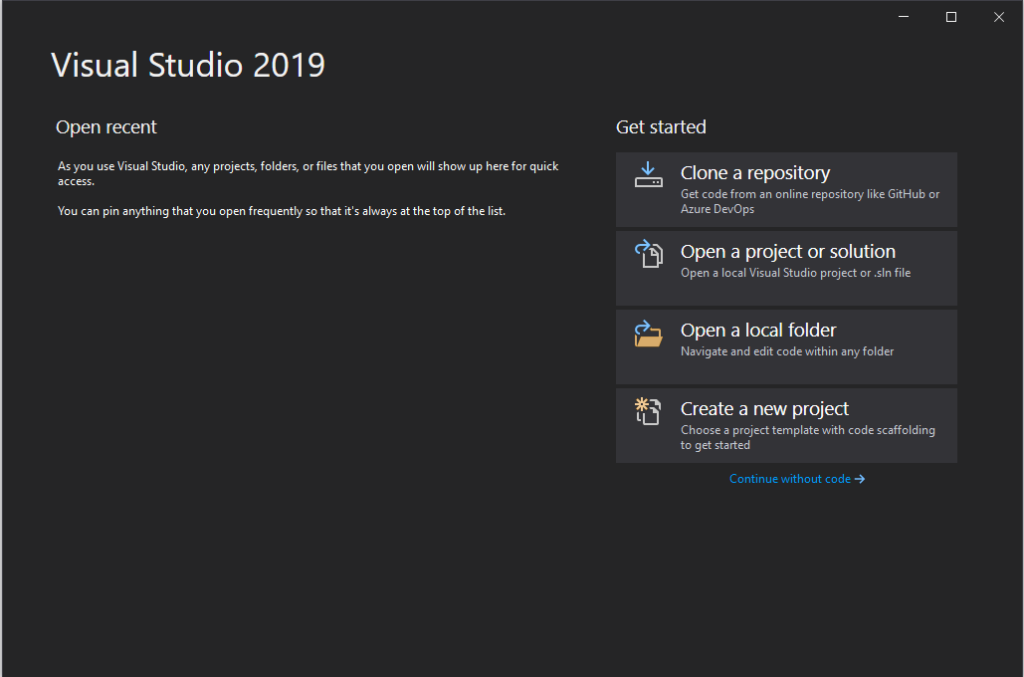
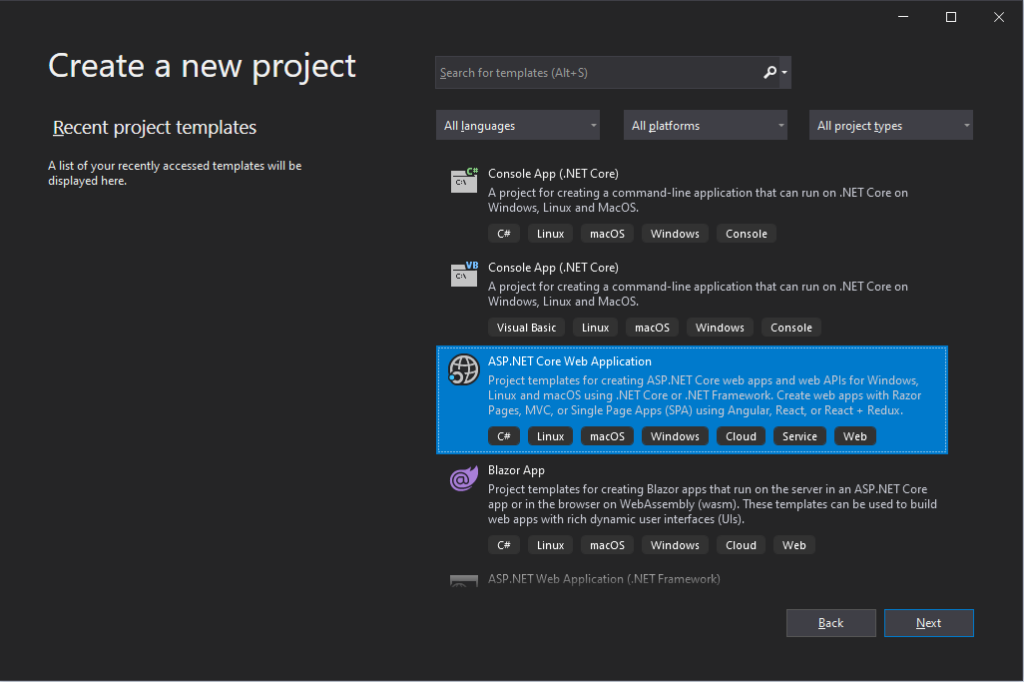
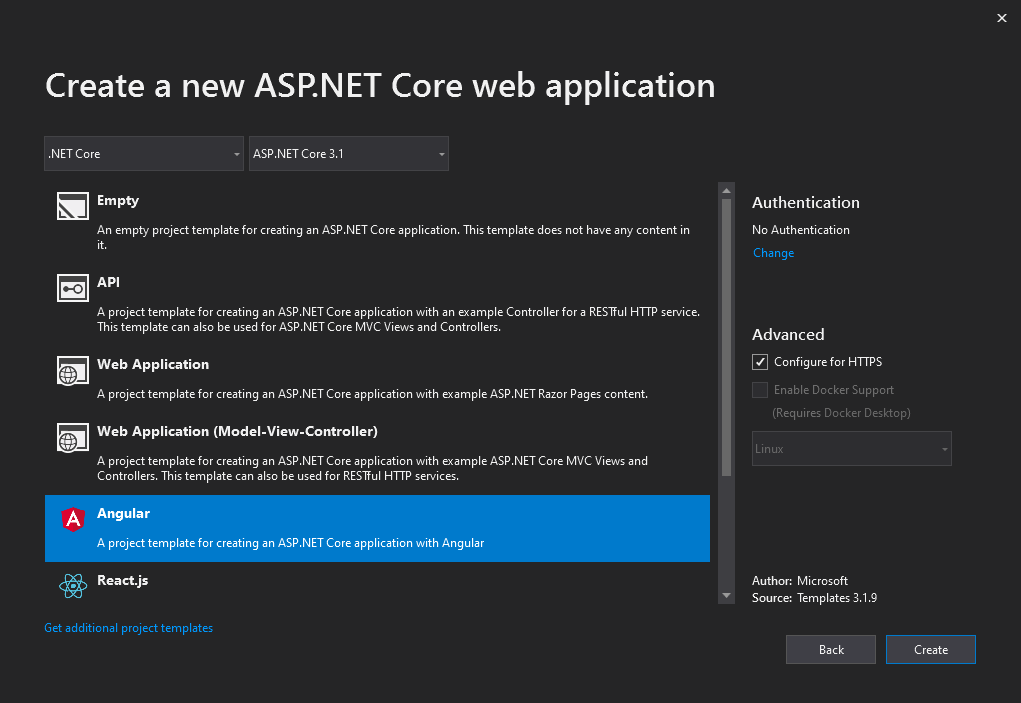
Click on “Create a new project”. Then select the “ASP.NET Core Web Application” template in the folowing screen and click Next.
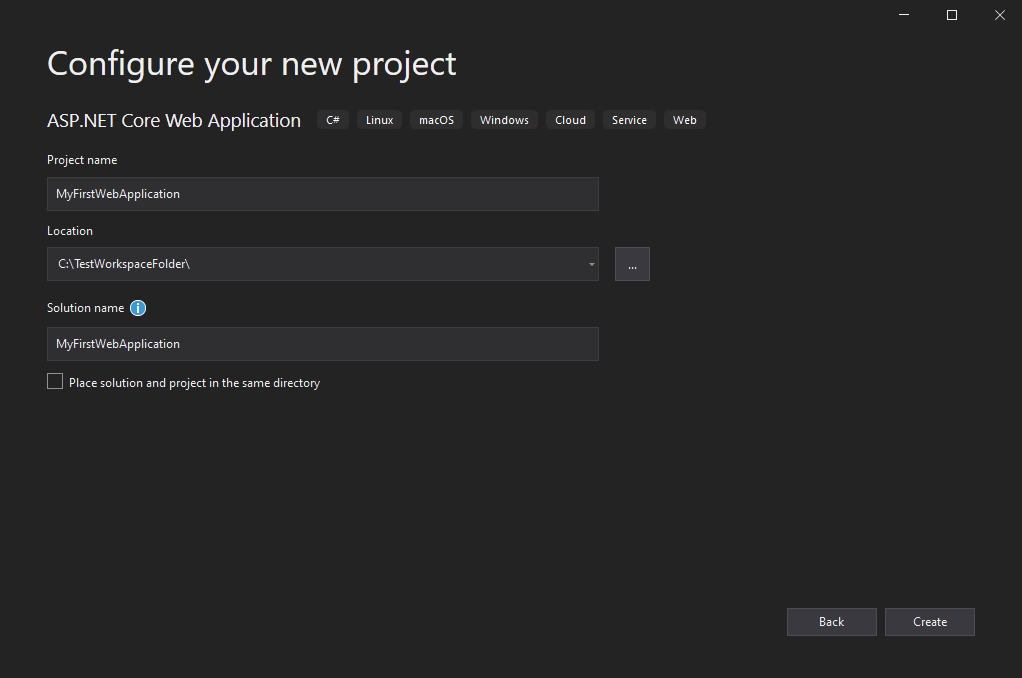
In the next screen configure your project by supplying a project name, project location and a solution name. Then click Create.
In the next screen make sure the latest version of ASP.NET Core is selected. Normally it is selected by default. Then select Angular template and click Create.
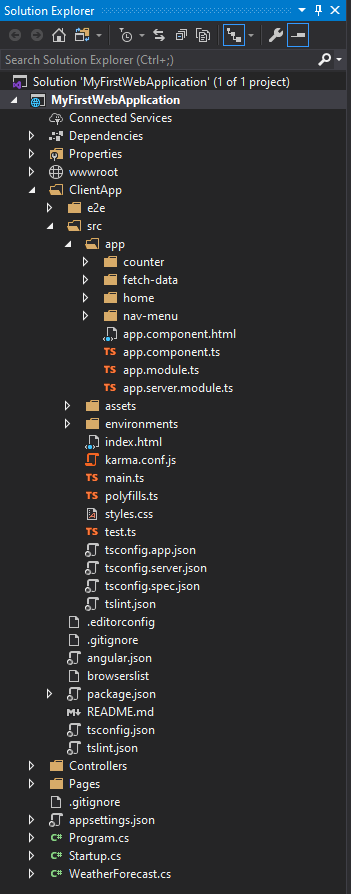
Visual Studio will take a few seconds to create the Angular project. Now, you can check the project structure that looks something like in the following picture.
Congrats! You have created an Angular project successfully. Now, right click the project and click Clean. Again, right click the project and click Build. This will take some time to build your project. Then, select the project and click IIS Express to run the project.

You can see your sample Angular web application is running on port 44342 (i.e. https://localhost:44342/) like in the picture below.

Now we will add Angular Material library to the project.
Include Angular Material library to the project
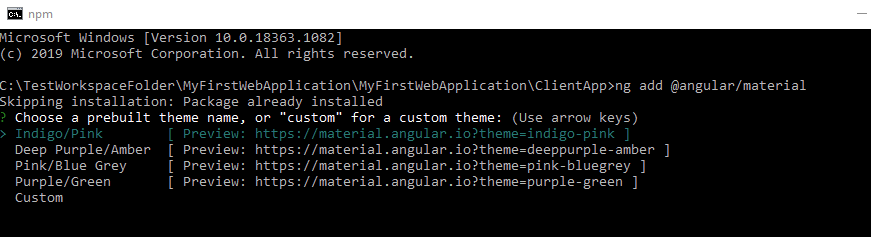
Open command prompt and navigate to the ClientApp folder of the project. Then run the below command:
ng add @angular/material
This will ask you to choose theme. Select the default one (Indigo/Pink) for now and press Enter.
Then it will ask you to set up global Angular Material typography styles and browser animation. Select “Yes” for now in both the cases.
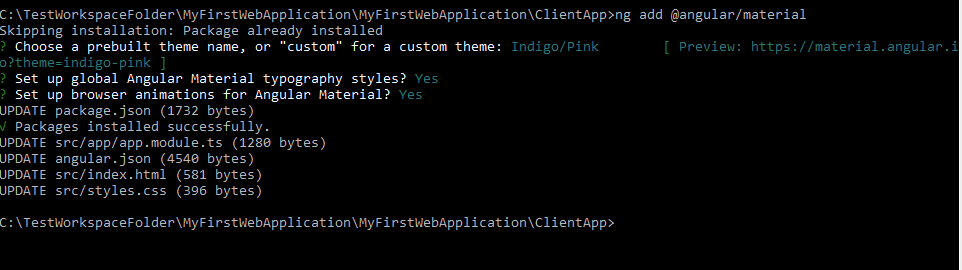
This will install Angular Material, the Component Dev Kit (CDK) and Angular Animations by default. After successful installation, you can see installed items in the node_modules folder inside the ClientApp directory of your project.
Some useful tips
Tip 1 :
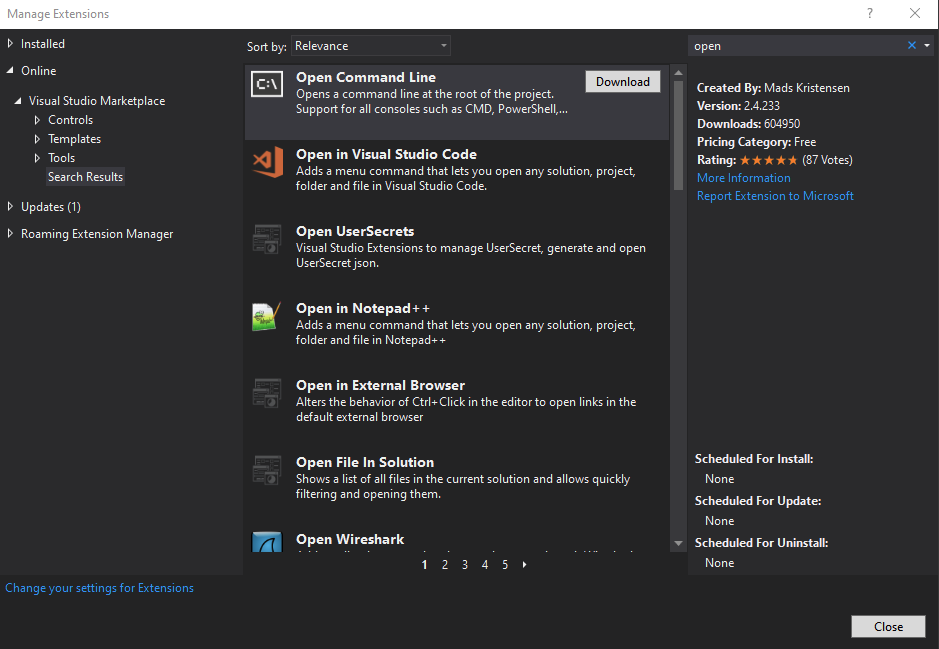
Install an extension called “Open Command Line” from Visual Studio Marketplace. This extension will help you in opening the command line from any directory in the project easily. To install the extension click Extensions in the toolbar menu.

Then click Manage Extensions. Search for “Open Command Line”. Then click Download.
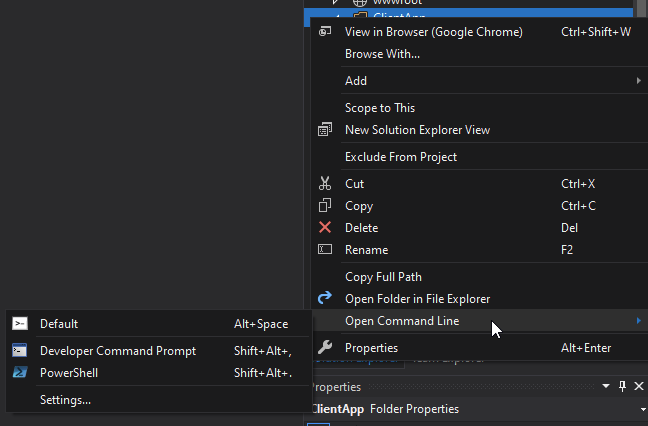
Close Visual Studio to install the extension. Then, start Visual Studio again. Now right click on ClientApp folder. In the context menu you can see the extension. You can click on Default in the context menu to open your default command prompt in Windows.
Tip 2 :
By default, Angular template inside Visual Studio 2019 Community Edition for ASP.NET Core 3.0 uses Angular 8. You can easily update these to the latest. You can verify the angular version in the package.json file inside ClientApp folder.
To update all the packages to the latest version, install the npm-check-updates package globally. To do this open command prompt and navigate to the ClientApp folder of the project. Run the below command to install npm-check-updates:npm install -g npm-check-updates
Then run ncu -u. This will upgrade all the version hints in the package.json file, to dependencies and devDependencies sections.
To update the node_modules run the command npm update.
*Note:
If you have just downloaded a project from a remote repository without the node_modules dependencies and you want to install the new versions first then just run npm install
And in order to read out your package.json file and install all of it’s peer dependencies, run npm install -g npm-install-peers.
Tip 3 :
Open the command prompt and navigate to the ClientApp folder. Then run the command npm run build -- --prod to check for any errors before publishing your code.